Playbook
Calendaring
Create event
There are three ways to create a calendar event.
- Double-click on the calendar to create an event.
- Drag the time slot you want to create an event for on the calendar.
- Press the keyboard shortcut '
C' to create an event at the current time.
All day event
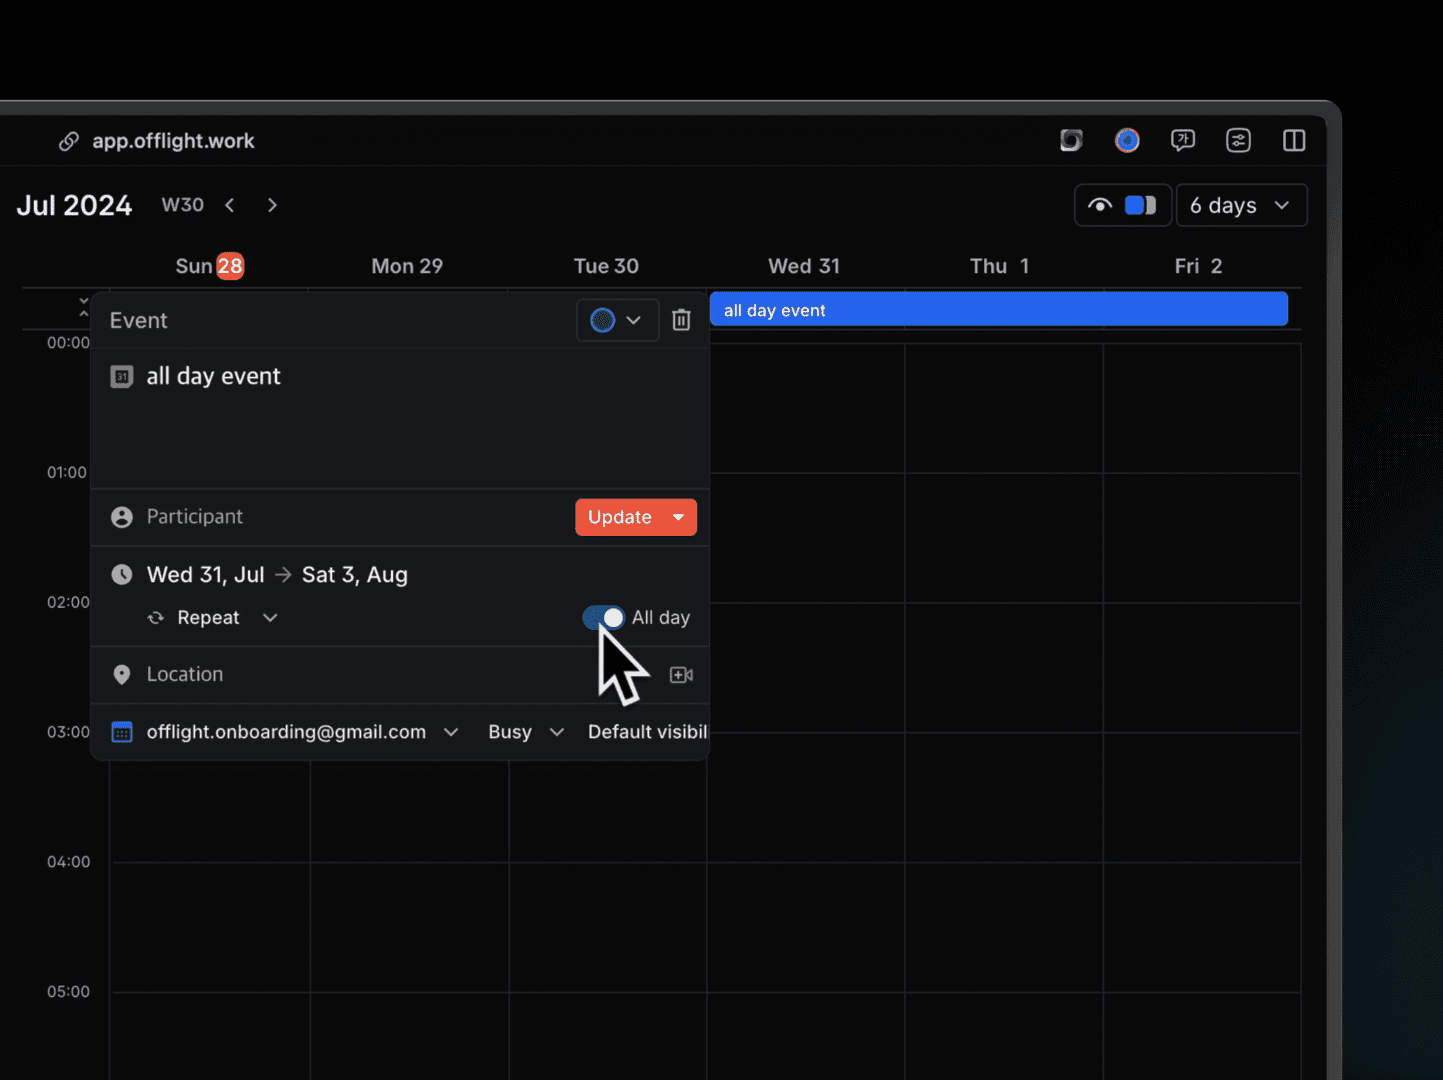
You can create an all-day event by enabling the all-day event toggle.
If you want to create an all-day event spanning multiple days, you can set the end date to the desired date.
Recurring event
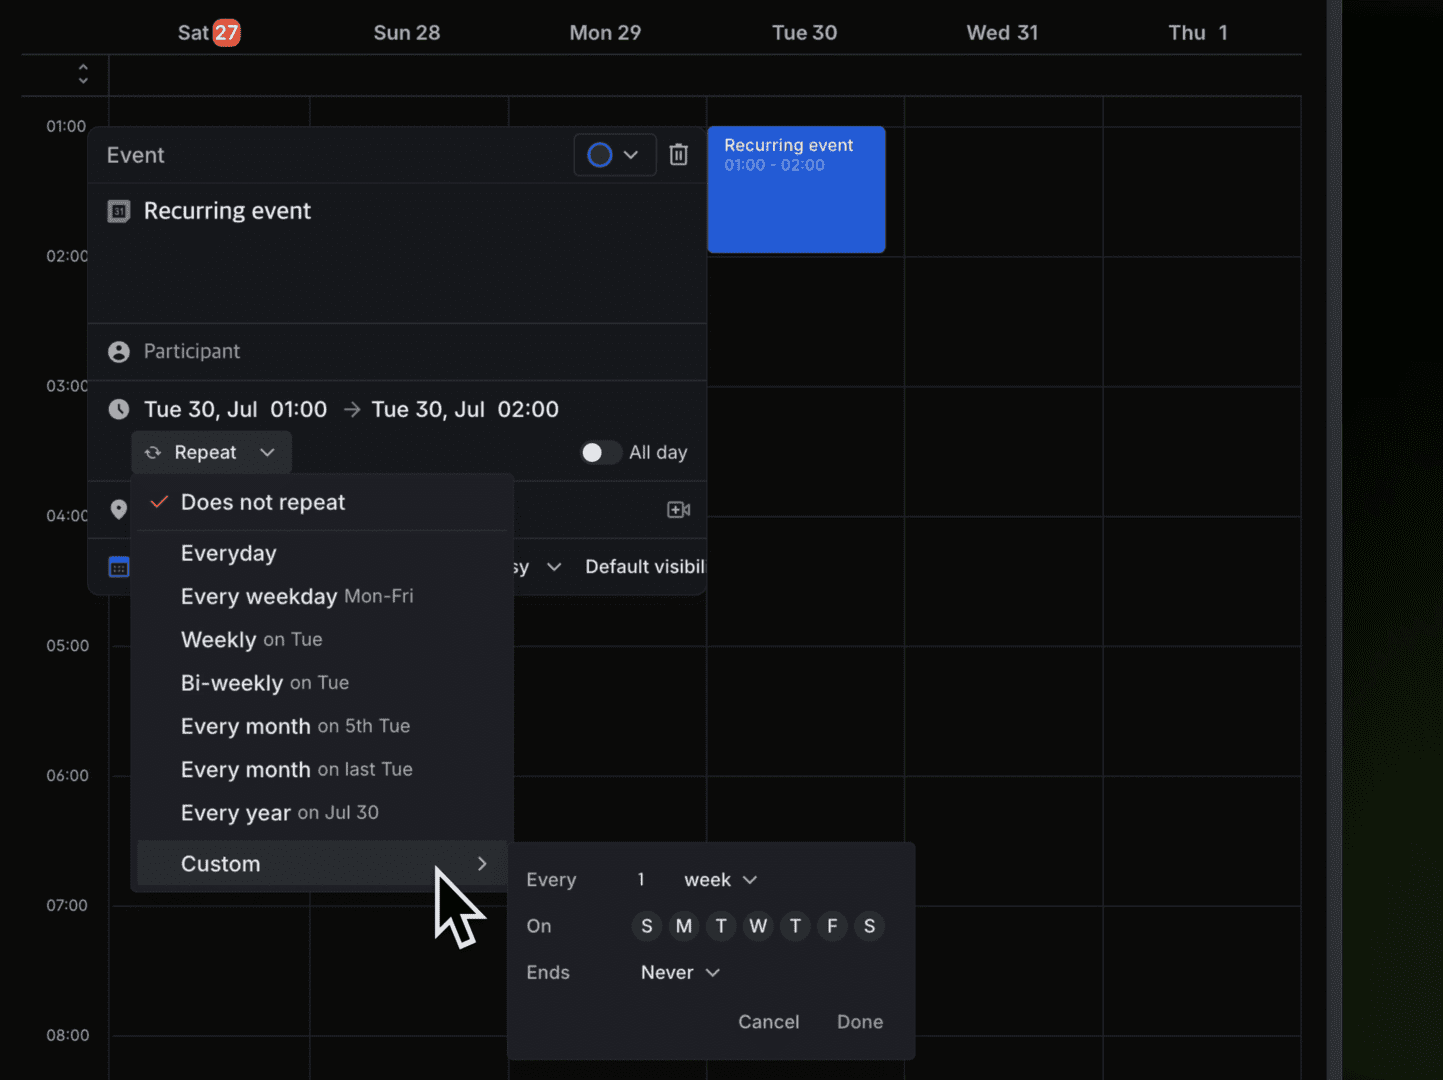
You can create recurring events by clicking the ‘Repeat’ button under the event date.
- You can quickly create recurring tasks using presets like:
- Daily, weekdays, weekly, bi-weekly, monthly, annually
- Customize your recurring schedule as desired:
- Set the days of the week (e.g., every Monday, Tuesday, Wednesday).
- Set recurrence for a specific period (e.g., until August 30).
- Set the repetition cycle (e.g., every two weeks, every three days).
Update / Invite event
When there is more than one participant in an event, you will be asked if you want to send an email notification about the changes when you modify or delete the event.
- You can press ‘
CMD+Enter‘ to update the event and send an invitation email to the participants. - You can press ‘
CMD+SHIFT+Enter‘ to update the event and invite participants without sending an email notification.
Manage event
Manageable Attributes
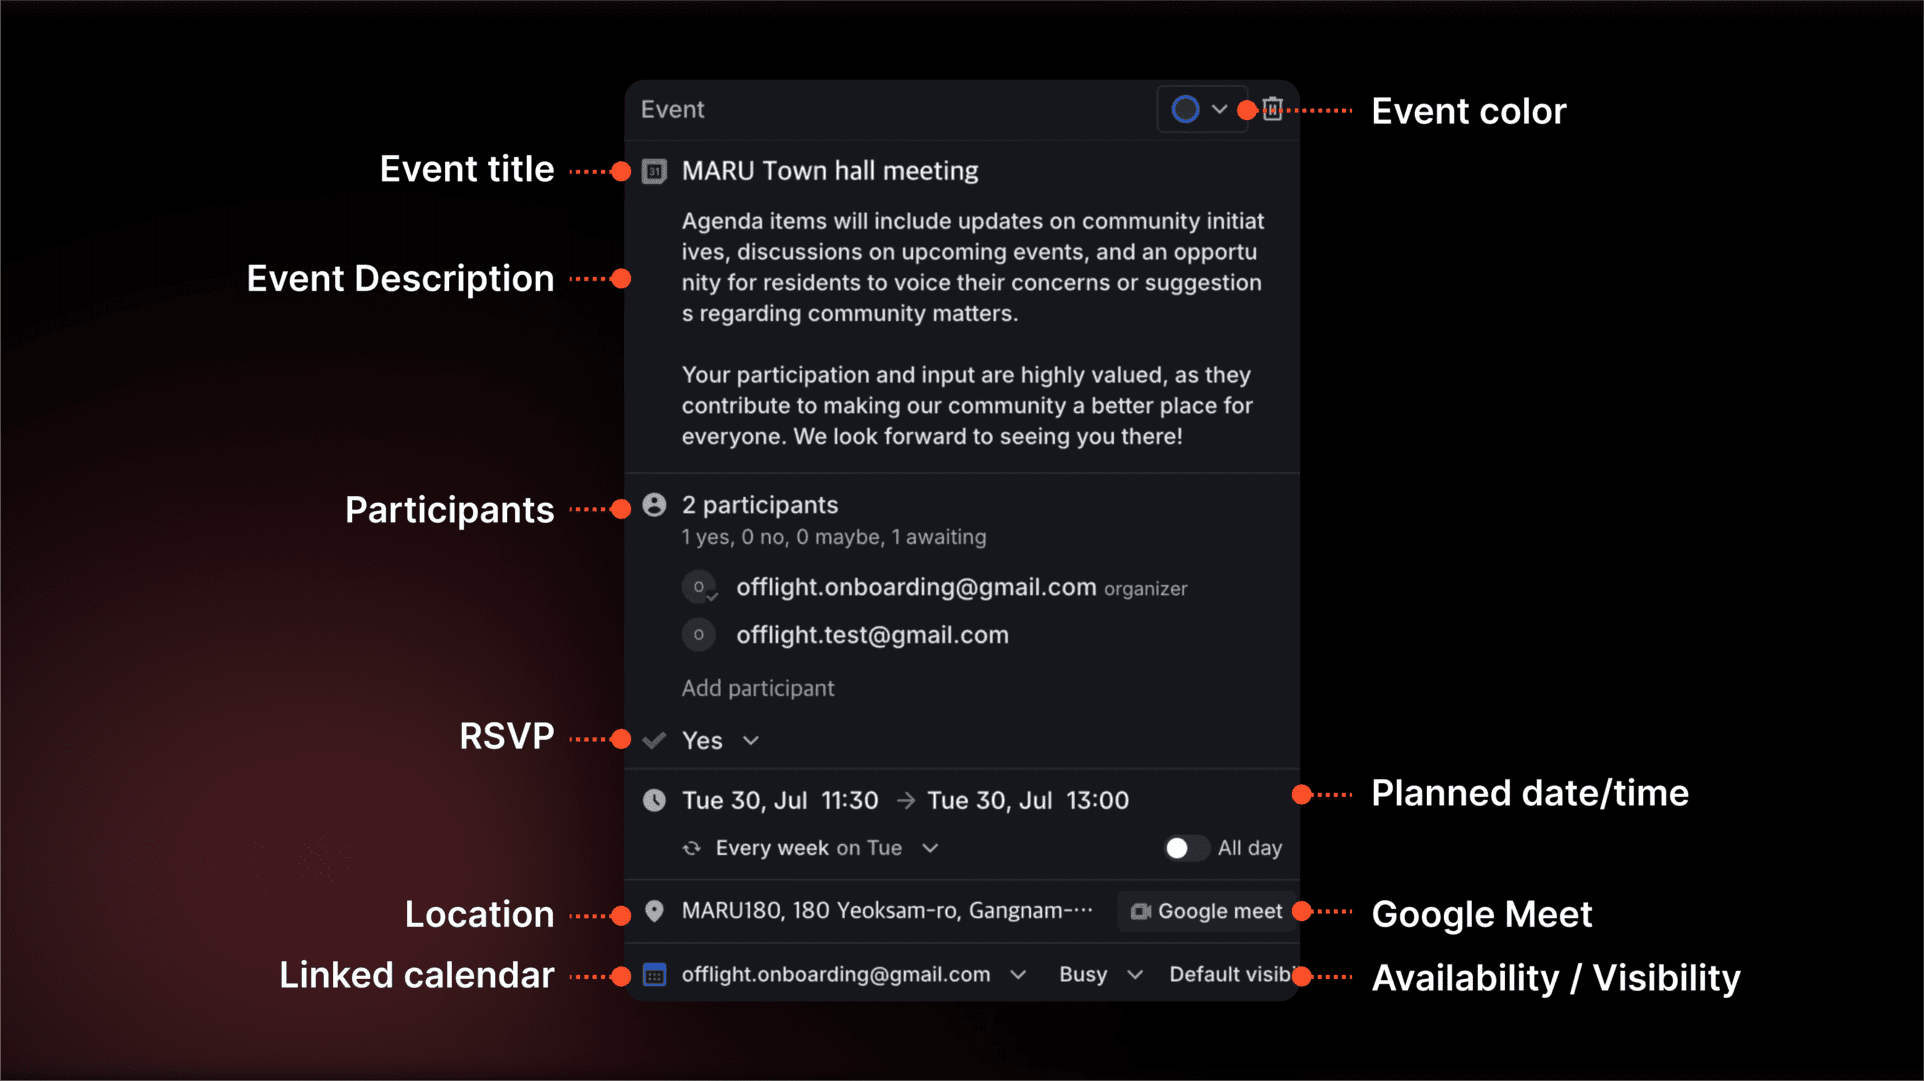
- Event Color: You can change the color of the calendar event.
- Event Name: The name displayed on the calendar.
- Event Description: Add additional details about the event, visible to all participants, not just to you.
- Participant: Add attendees to the event.
- Contacts from linked Google accounts can be auto-completed.
- RSVP: Manage responses to event attendance.
- Planned Date & Time: Manage the start and end dates and times of the event.
- Location: Enter the location of the event.
- Locations registered in Google Maps can be auto-completed.
- Google Meet Integration: Create a Google Meet link for the calendar event. If a Google Meet link is available, you can join the event via a shortcut.
- Linked Calendar: Set the calendar to which the event will be added.
- Booking Availability:
- Free: Even if there is a schedule in the calendar, it remains open for new invitations. For example, with services like Calendly, times marked as Free are shown as available for booking.
- Busy: If there is a schedule in the calendar, no new invitations will be accepted for that time.
- Calendar Visibility:
- Public: The event name is visible to everyone. For example, an event titled "Calendar Guide Creation" will be displayed as "Calendar Guide Creation" to others.
- Private: The event name is hidden. For example, an event titled "Calendar Guide Creation" will appear as "Busy" to others.
- Default Visibility: Follows the default setting of the linked calendar. Usually, the default is set to "Public," and changes can be made in Google Calendar settings by selecting the calendar and adjusting the access permissions.
Responding to RSVP
The calendar event will display differently based on the RSVP response.
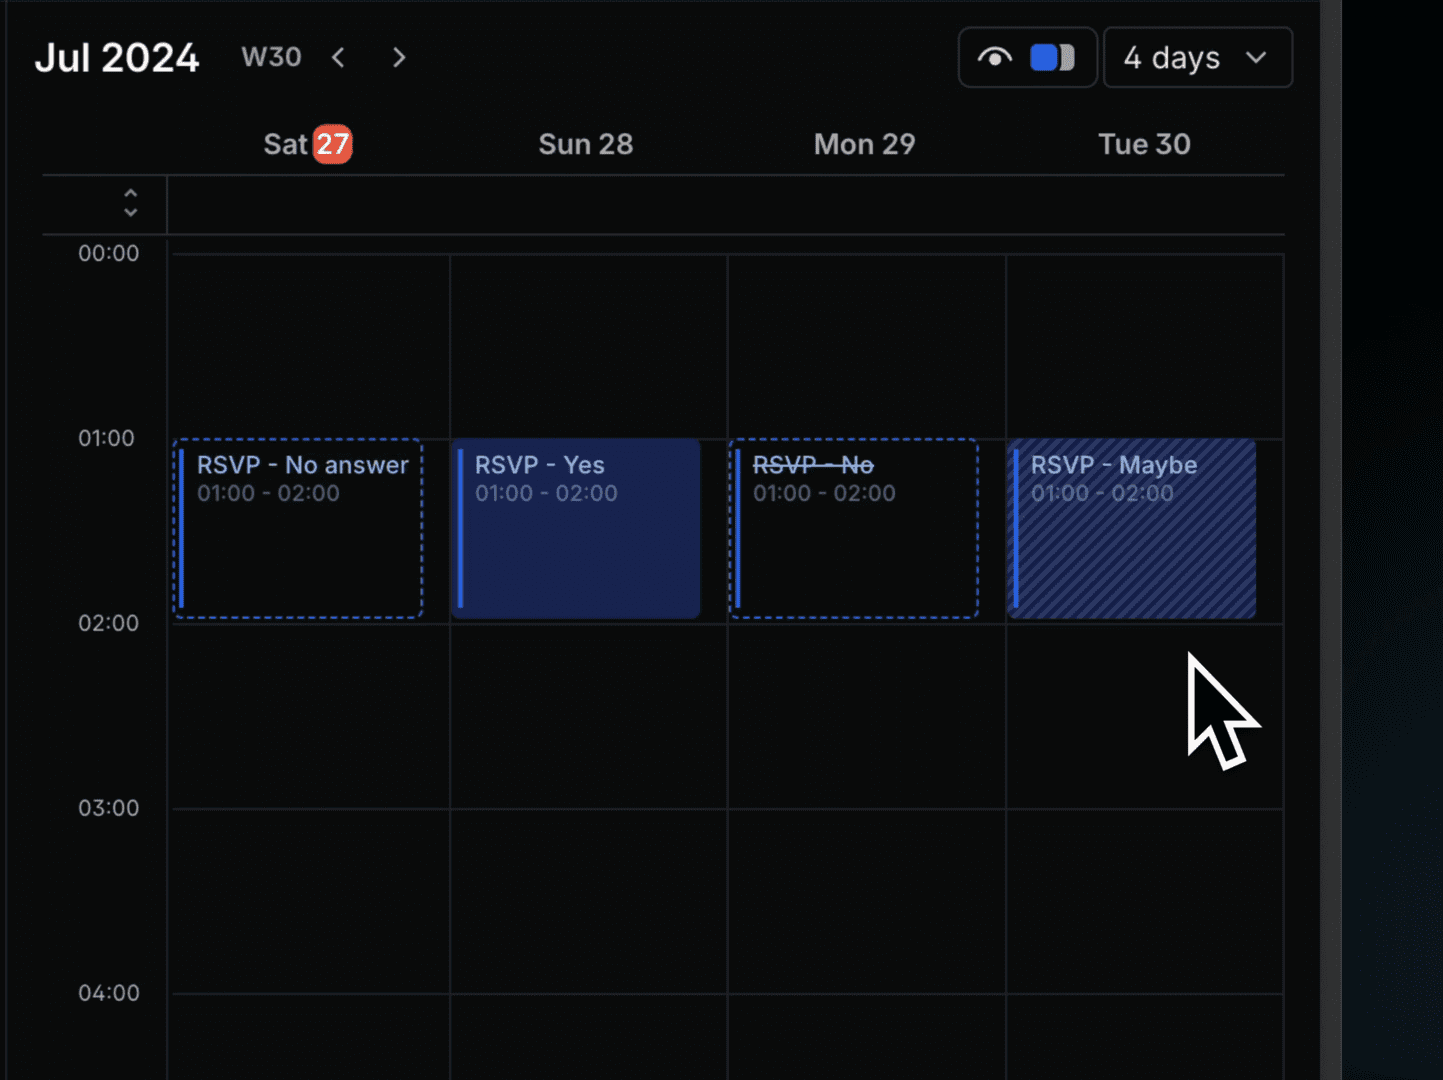
When responding to an event's RSVP for the first time, you can see all the RSVP options(YES, NO, maybe). If you have already responded to the RSVP, you can click on the existing response to modify it.