Playbook
Task management
The Basics
Create Task
- You can create a task by typing the task title in the [add..] input field in the Uplanned or Planned lane on the Planning page and pressing Enter.
- Hover over a list to see the Add Task icon, and click it to activate the new task creation.
- On the Focus page, click the + button at the bottom of the list to add a new task.
- Protip - Use the
arrow keys(↑,↓,←,→)orJ,KandTapto navigate tasks, and press the ‘N’ keyboard shortcut in the lane or list where you want to create a new task.
Done Task
- Click the checkbox on the left side of the task to mark it as completed.
- Completed tasks move to the Done box at the bottom of the Planned lane.
- If you want to undo a completed task:
- Immediately after completion, press
CMD+Zto undo the action. - Click the checkbox again in the Done box to revert it to an incomplete state. The task will return to the planned tasks for that date.
- Immediately after completion, press
- Press the ‘
E’ keyboard shortcut to quickly mark a task as completed.
Task Note
- You can enter and save information related to a task in the task popover.
- Click the task with the mouse to open the popover.
- Enter the information to record in the Description area.
- The entered information is automatically saved.
Set Deadline of Task

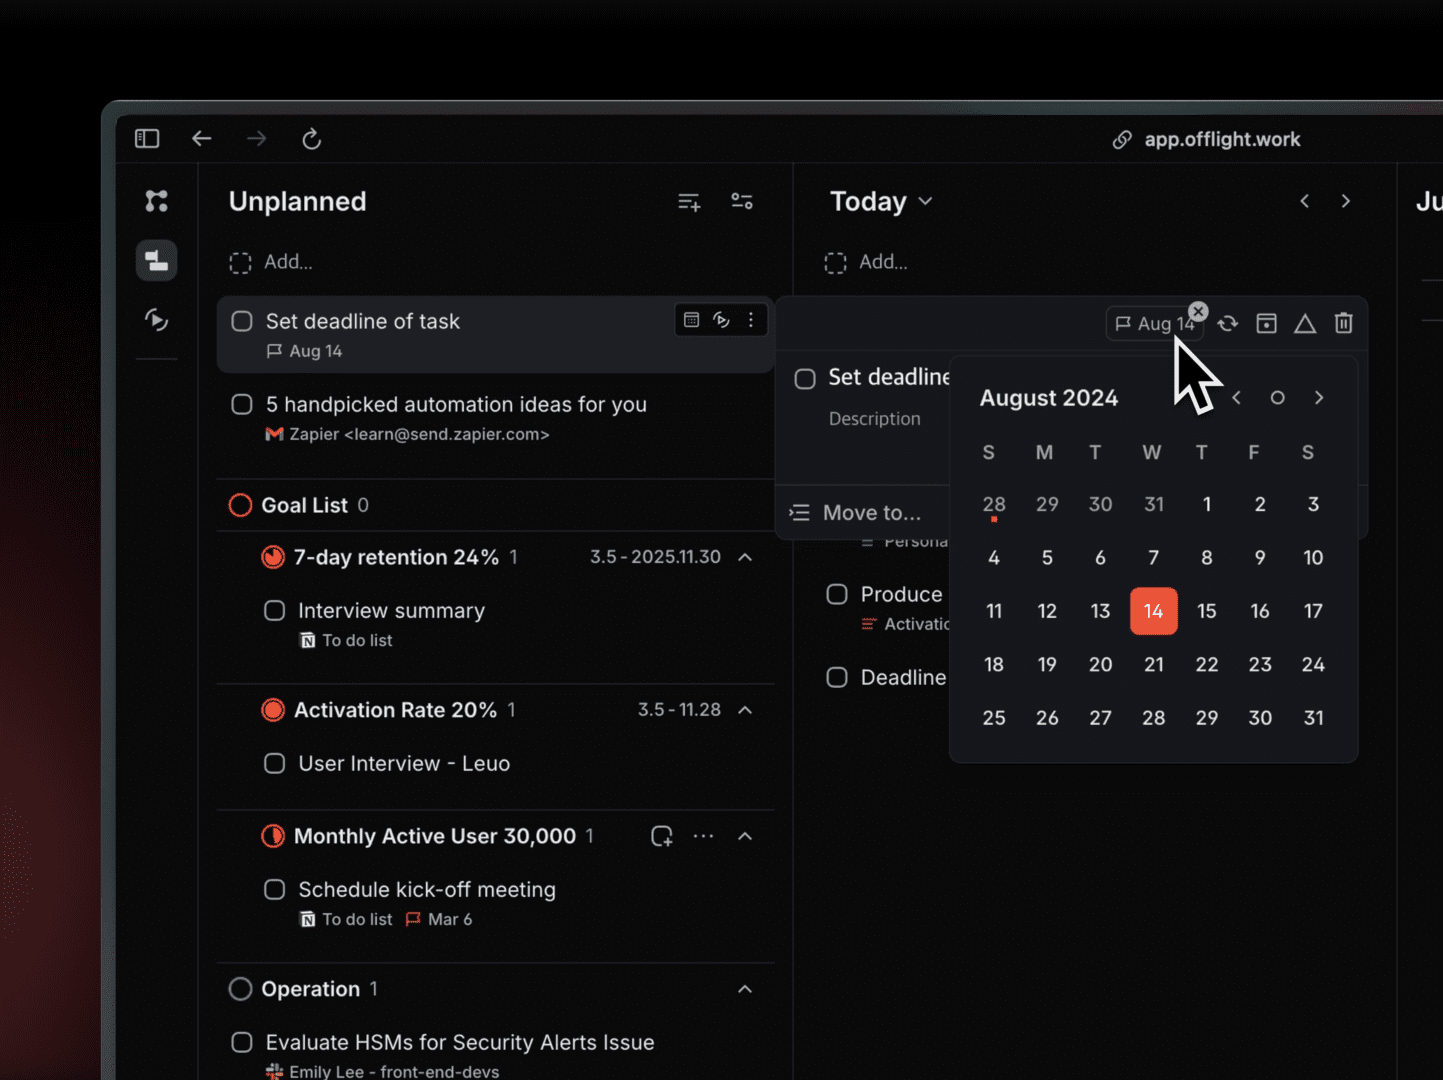
You can enter and save the deadline for completing a task.
- Click the task with the mouse to open the popover.
- Click the flag icon at the top right of the popover to enter the deadline.
- The entered deadline is displayed in the information area at the bottom of the task card. Flags for today or past deadlines are marked in red.
Add link to task

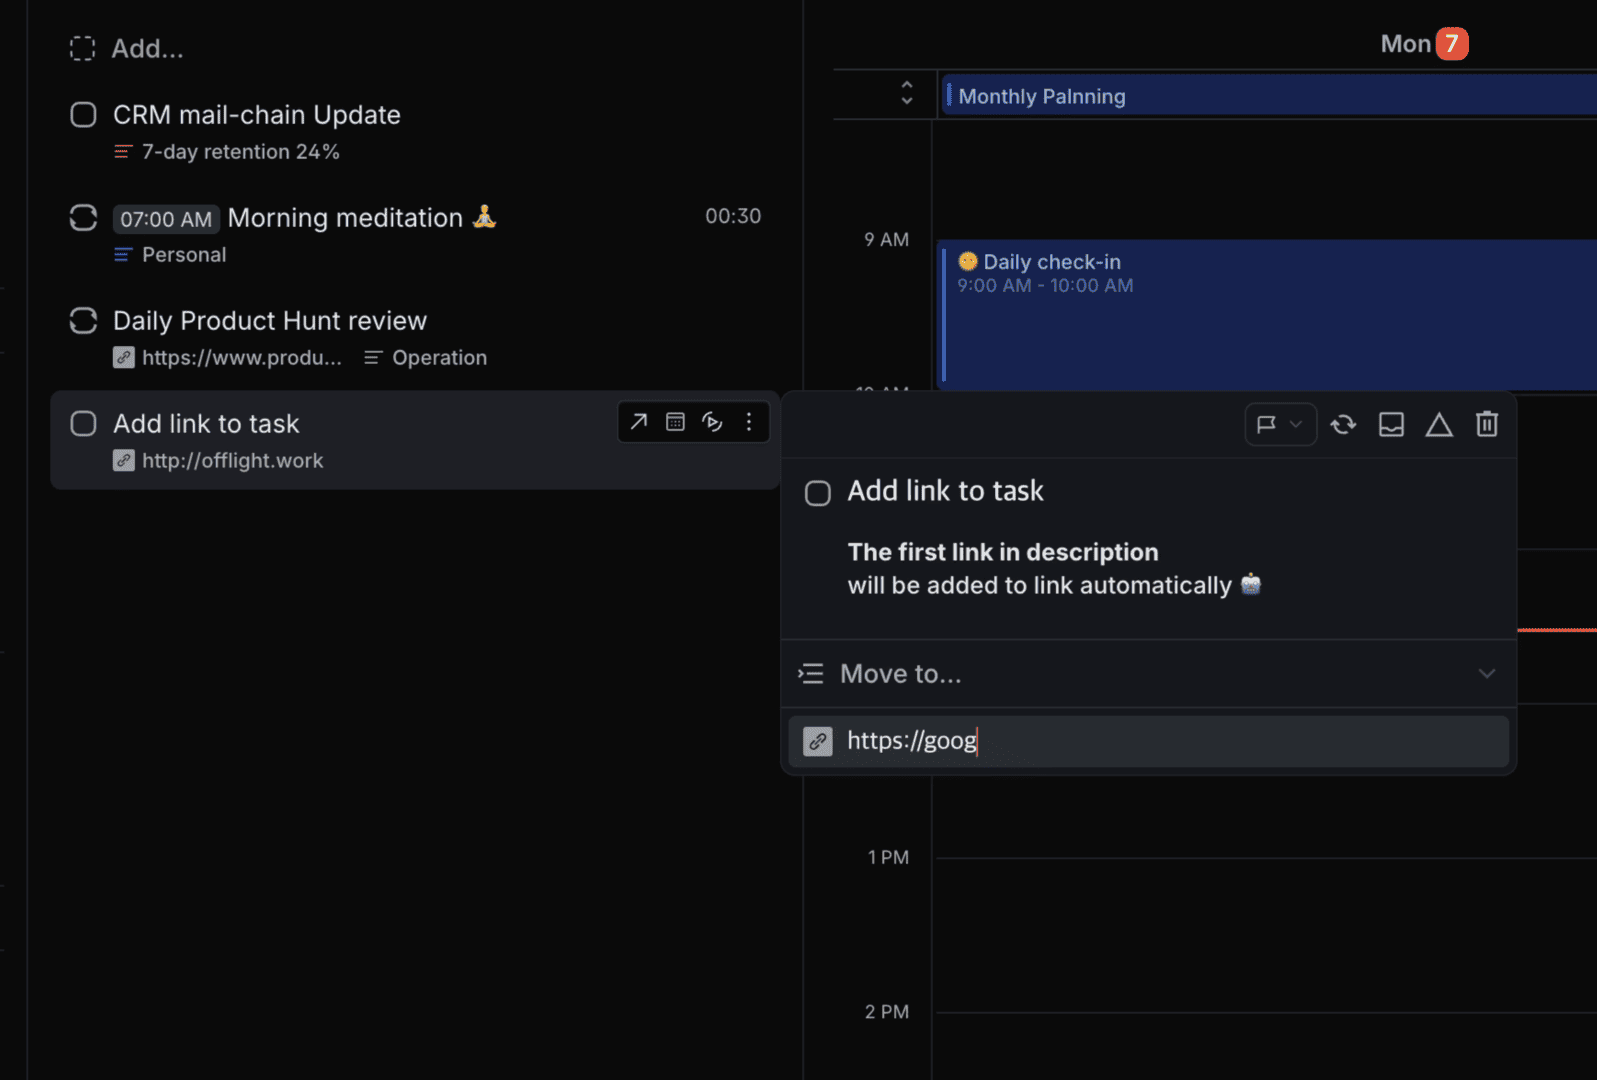
You can record links related to a task and quickly access them when needed. Here's how:
- Click on a task to open the popover window.
- In the popover window, scroll to the bottom and enter the relevant URL in the Link input field.
- Alternatively, you can include links directly in the task notes area. If there are multiple URLs, the first one will be automatically saved in the Link input field.
- After adding a link to task, you can easily open the link by shortcut "O" .
Plan Task
Planning with Command Bar
- How to use the Planning Command Bar:
- Hover over a task card and click the calendar icon to access the planning command bar.
- Activate the task you want to plan using keyboard navigation and press the ‘
H’ key to access the command bar.
- Date Planning : You can plan tasks by entering dates, months, days of the week, periods, or numbers like 1, 2, 3, etc.
- Date - 7/29
- Month - July
- Day of the week - Mon
- Period - Next week, Next year..
- Number - 1 (in 1 day), 2 (in 2 days)..
- Time Planning: Add a time after the date to plan your tasks. We support both 24-hour and 12-hour formats.
- Tomorrow 13:00
- Tue 3PM
- Duration Planning: Plan your task duration using keywords like 'to', '~', '-', or 'for'.
- Tomorrow 4pm to 5pm
- Today 5pm for 1 hour
- Mon 4pm ~ Tue 8am
- Mon 4pm - Tue 8am
Plan Today, Postpone Task 1 Day, Unplan Task
- Use the [
SHIFT+→] shortcut on tasks in the Unplanned lane to plan them for today. - Use the [
SHIFT+→] shortcut on tasks in the Planned lane to postpone them by 1 day. - Use the [
SHIFT+←] shortcut on tasks in the Planned lane to unplan them.
Time Blocking
You can register tasks as events on the calendar to plan their start and end times.
- Drag tasks to the calendar to schedule them as events.
- Click and drag the bottom of the calendar event to adjust the end time.
- You can also modify the task end time in the calendar popover.
Tasks scheduled on the OFFLIGHT calendar are also scheduled on the linked Google Calendar.
- When you complete a task in OFFLIGHT, a checkbox emoji (✅) is added to the Google Calendar event title, marking it as completed.
- If you only want to use time planning without registering on Google Calendar, you can change the settings.
- Settings → Calendar:
- Method 1: Turn off the 'Block time for scheduled tasks on Google Calendar' setting.
- Method 2: Change the sharing options as follows:
- Booking availability: Free
- Calendar visibility: Private
- Method 1 ensures the event is not registered on your Google Calendar. Method 2 registers the event on your Google Calendar but keeps it private from others.
- Settings → Calendar:
Prioritize Task
You can visually highlight the most important tasks to be done today using the Top Priority feature.
- Hover over the task card, click the more options button, and select the Top Priority menu.
- Click the task to open the task popover, and click the triangle icon to set it as Top Priority.
- Use the ‘
!’ (SHIFT+1) keyboard shortcut to set Top Priority for the active task.
Organize Task
You can create and manage lists to organize tasks.
- To move a task to a list:
- Drag the task to the list.
- Click the task to open the popover, and use the move to list menu at the bottom of the popover to move it.
- Use the ‘
L’ keyboard shortcut on the active task to access the list connection command bar and move the task.
Time Tracking
You can track the actual time spent on tasks and check the daily time usage for each list.
- Hover over the task card with the mouse and click the play icon to start time tracking.
- After starting, the play icon changes to a pause icon. Click the pause icon to pause time tracking.
- Use the ‘
F’ keyboard shortcut on the active task to start time tracking.- Press the
Spacebarat any time to pause time tracking, regardless of task activation.
- Press the
- Check the time usage for each list in Today's Summary at the top right of the Focus page.
Recurring Task
You can set tasks as recurring in the task popover.
- Quickly create recurring tasks using presets like:
- Daily, weekdays, weekly, bi-weekly, monthly, annually
- Customize your recurring schedule as desired:
- Set the desired days of the week (e.g., every Monday, Tuesday, Wednesday).
- Set the recurring schedule for a specific period (e.g., until August 30).
- Set the repetition cycle (e.g., every two weeks, every three days).